Policies Screen
Policies are an ideal way to create a collection of functionality of a same type. The policy then can be pushed out to the device(s) with one click. There are different kinds of policy types ranging from location, telephony to Application management. Commands of a certain type can only be added to a policy of that type. A policy can be pushed out to both a single device or a group.
A policy is rolled back by applying the anti-policy. NB. Please note that once a policy has been applied to any device, that policy can no longer be amended. It ould have to be deleted and recreated with the further functionality.
Below is the policy screen.
Add Policy
Below is an example of creating a new DateTime policy with a name of My DateTime policy1.
The Policy Type dropdown is where the system user can select from all the possible policy types.
Once the correct details have been entered, click Save Changes and OK in the pop up that appears. The system user can click return To policies List to view the created policy.
Edit/Remove policy
The policy may be edited or removed before it has been rolled out to any device by clicking the edit link. Please note the newly created policy does not have an Apply Policy button yet; This is due to it being an empty policy.
Populate a policy with functionality
In this example the DateTime policy 'My DateTime Policy1' shown above will be used.
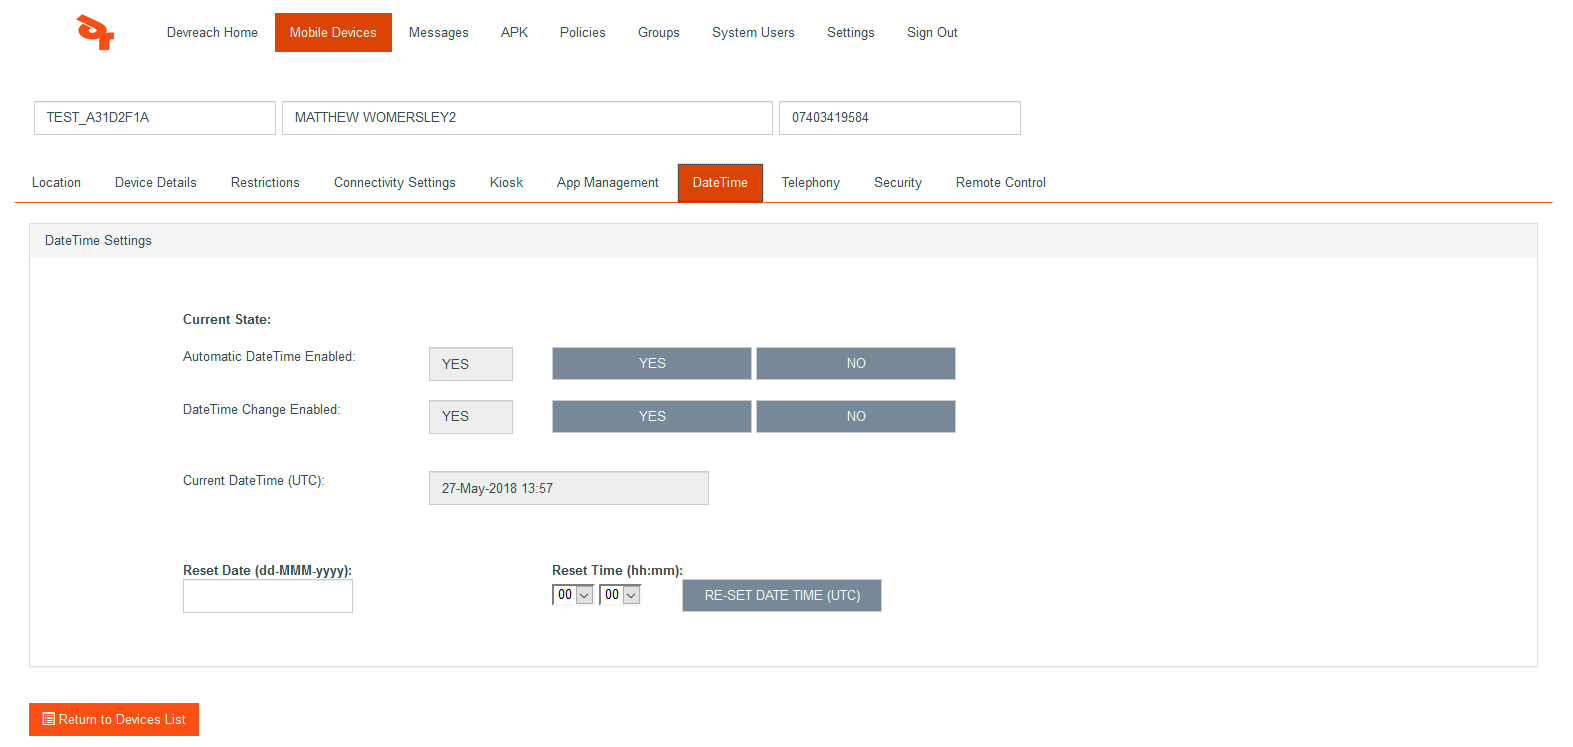
The sytem user can go to the Settings page of a particular device. E.g. Mobile Devices → Settings. From here, The DateTime tab can be selected.
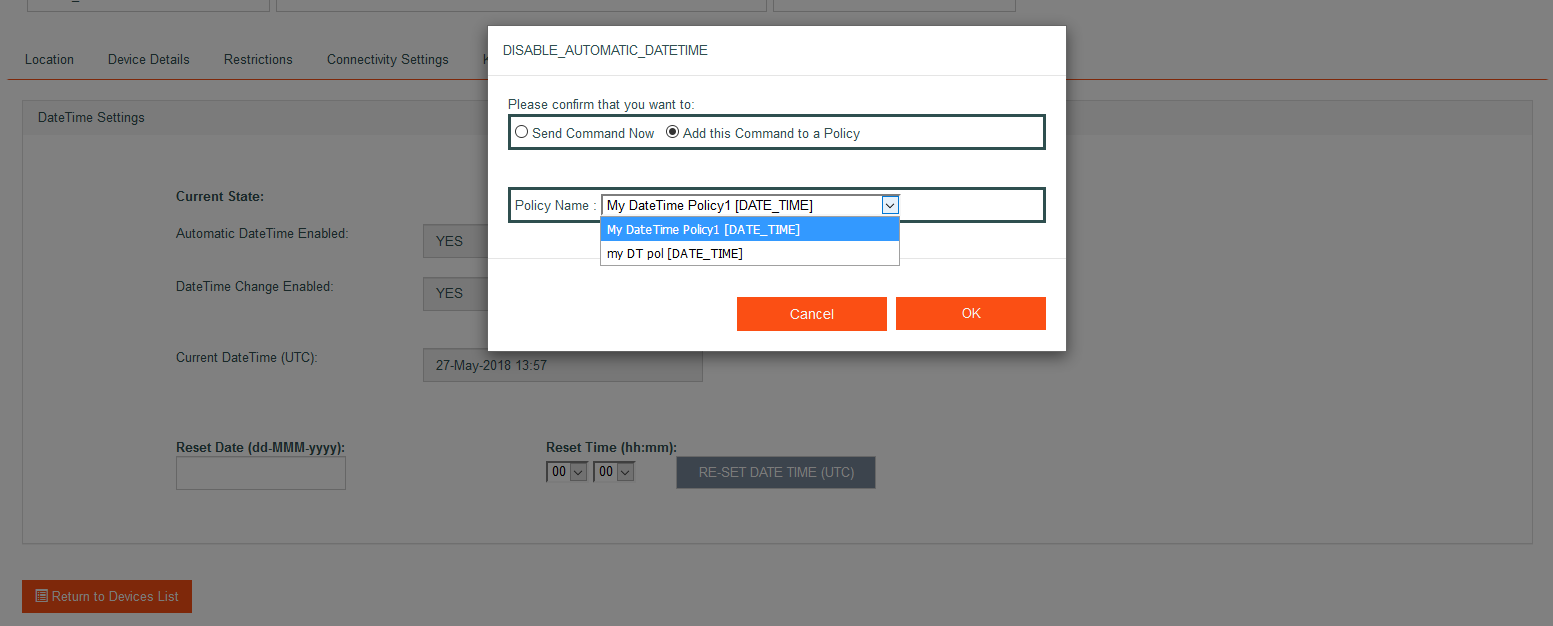
A policy could be created that states 'Automatic datetime' is not enabled. To do this click on the corresponding NO button and the following pop up will appear. Select the 'Add this command to policy' radio button and then select the policy name from the dropdown box.
The policy 'My DateTime Policy1' now has an Add Policy button as at least one functionality has been added to it.
Select Group To apply policy
Before applying a policy, a group needs to be selected. The group is the list of employees who will receive the policy. Click Apply Policy and the following screen will be presented.
Select a group and click Apply Policy, click the ok button and the policy will be sent to the group. A confirmation box that the policy is sent is below.
View Compliance
Once a policy has been applied to a group, the system user can check this by clicking the 'view compliance' link.
This screen shows the policy name and the date it was applied and also when or if the Anti-policy was applied. There is also an icon in the Policy Receipt Confirmed field. This icon will turn green if the policy id currently applied, orange if the Anti-policy is currently applied or grey if neither policy or Anti-policy has been applied yet.
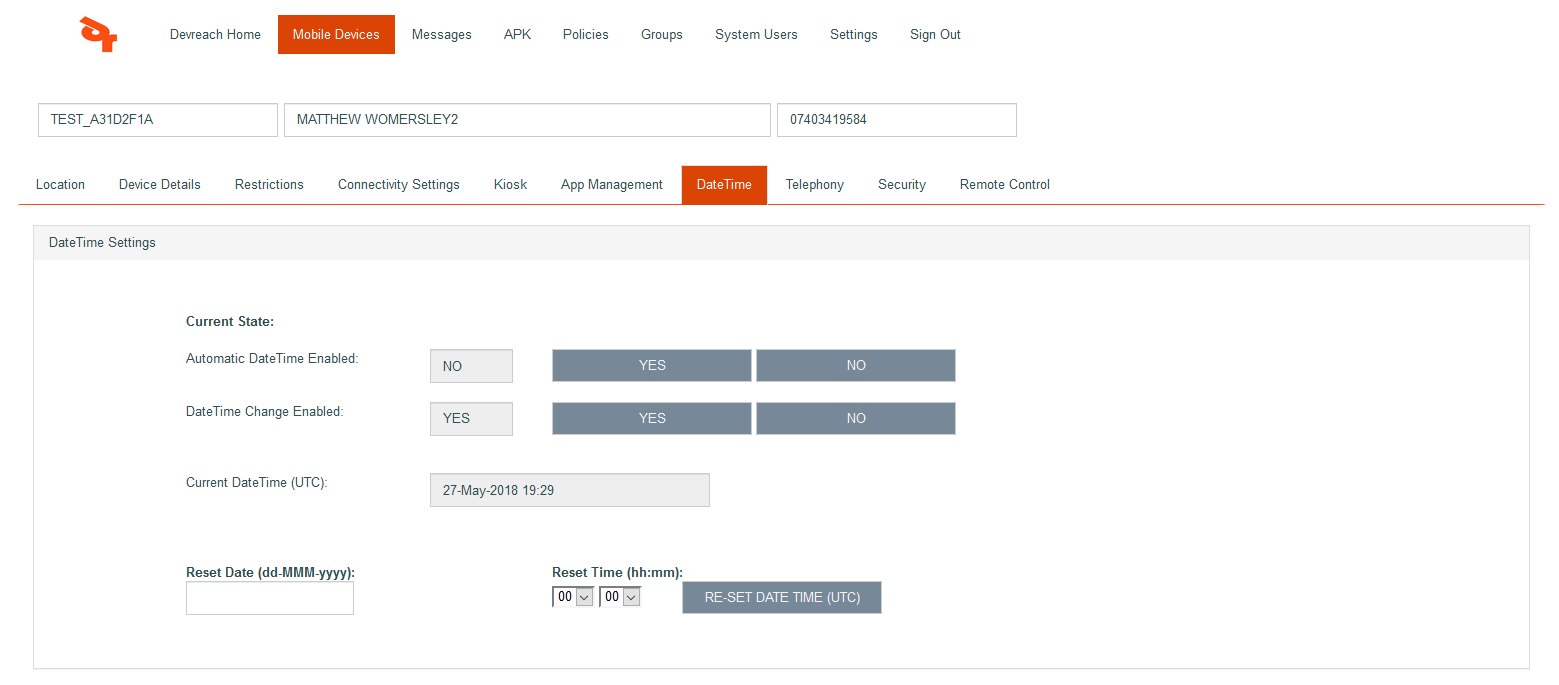
The system user can now check an idividual device which was in the group the policy was applied to. To do this, click Mobile Devices → Settings → DateTime tab.
As the screen below shows, the automatic datetime enabled is set to NO via the policy.
AntiPolicy
To roll back any policy that has been applied to a group, the policy's anti-policy must be applied. This can be done by clicking add policy button in the usual way, select the group again, but this time click on Apply Anti-Policy.
The screen below will be shown.


