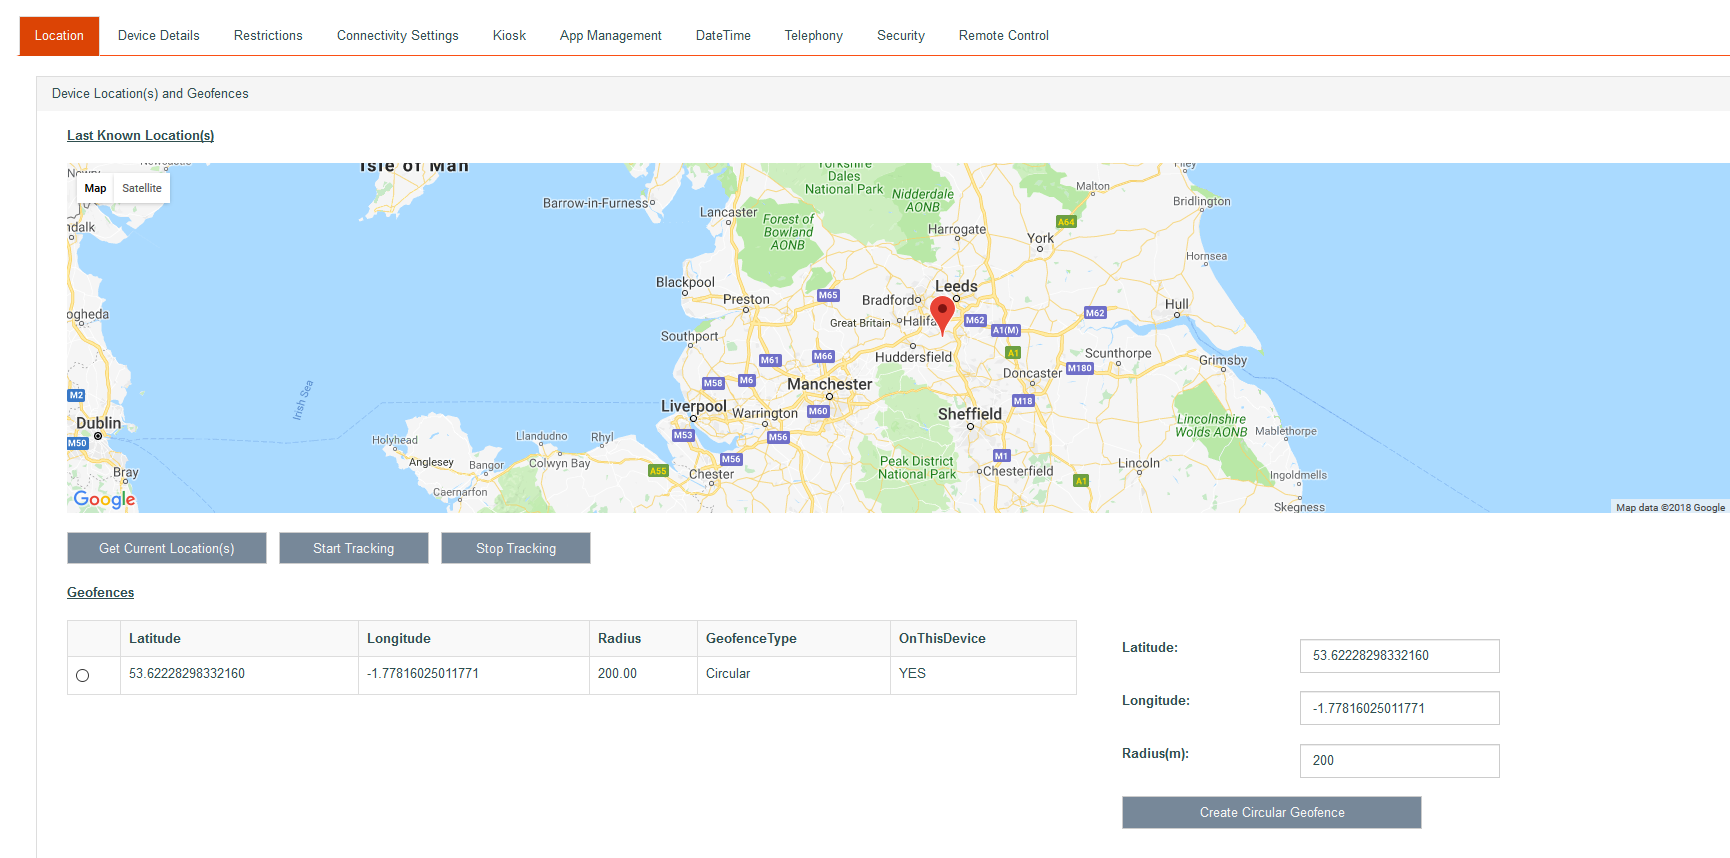
Location Screen
The Location screen provides functionality that allows the system user to get the location of the device, start/stop tracking that device and create geofences.
Get Current Location
This sends a command to the device that retrieves its current location. How fast a device can acquire a GPS lock can vary and is subject aa few things:
- The quality of the device, higher end phones will have better and more reliable components.
- Whether the phone is indoors or not. GPS works better when in plain view of the satellites.
- If the device is in power save mode or has low battery power
- GPS must be enabled on the device.
The Devreach Android app will attenpt to look for GPS for a maximum of 45 seconds, after which the request will be cancelled; This is to preserve batter power as GPS can drain battery quite quickly.
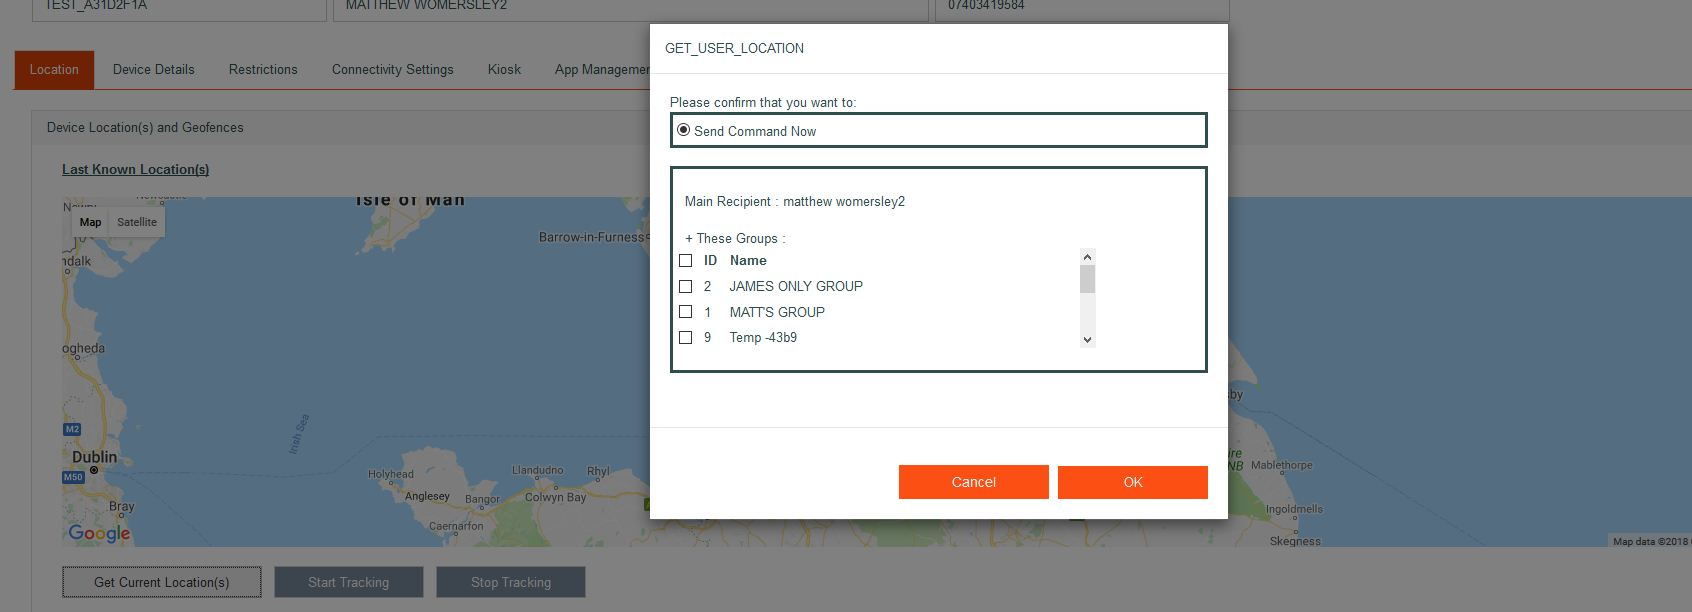
To get the current location of a device, click Get Current location(s) button.
The following popup will appear. NB. Please note you can also add this command to any groups.
Click the OK button to send the command. It should take less than 45 seconds to acquire the lock, but please wait up to 1 minute for the map to refresh.
If the push pin on the map is clicked on directly, the device's username and date/time of the lock are displayed.
Start Tracking/Stop Tracking
These buttons will present the same screens as above. However, base based on Config Options the company has chosen when purchasing the Devreach system, a tracking command that has been sent to the phone will acquire a GPS lock at a set frequency. This frequency is determined by the Config Option. For example if a company has set the tracking config option to 10 minutes, the tracking service will run every 10 minutes automatically.
NB. Please chose a Tracking Config Option that is not too low (less that 10 minutes). A low figure will have a serious impact on battery life. A good figure would be 30 mins to 1 hour.
The tracking service will run indefinitely, until Stop Tracking command is sent.
Geofences
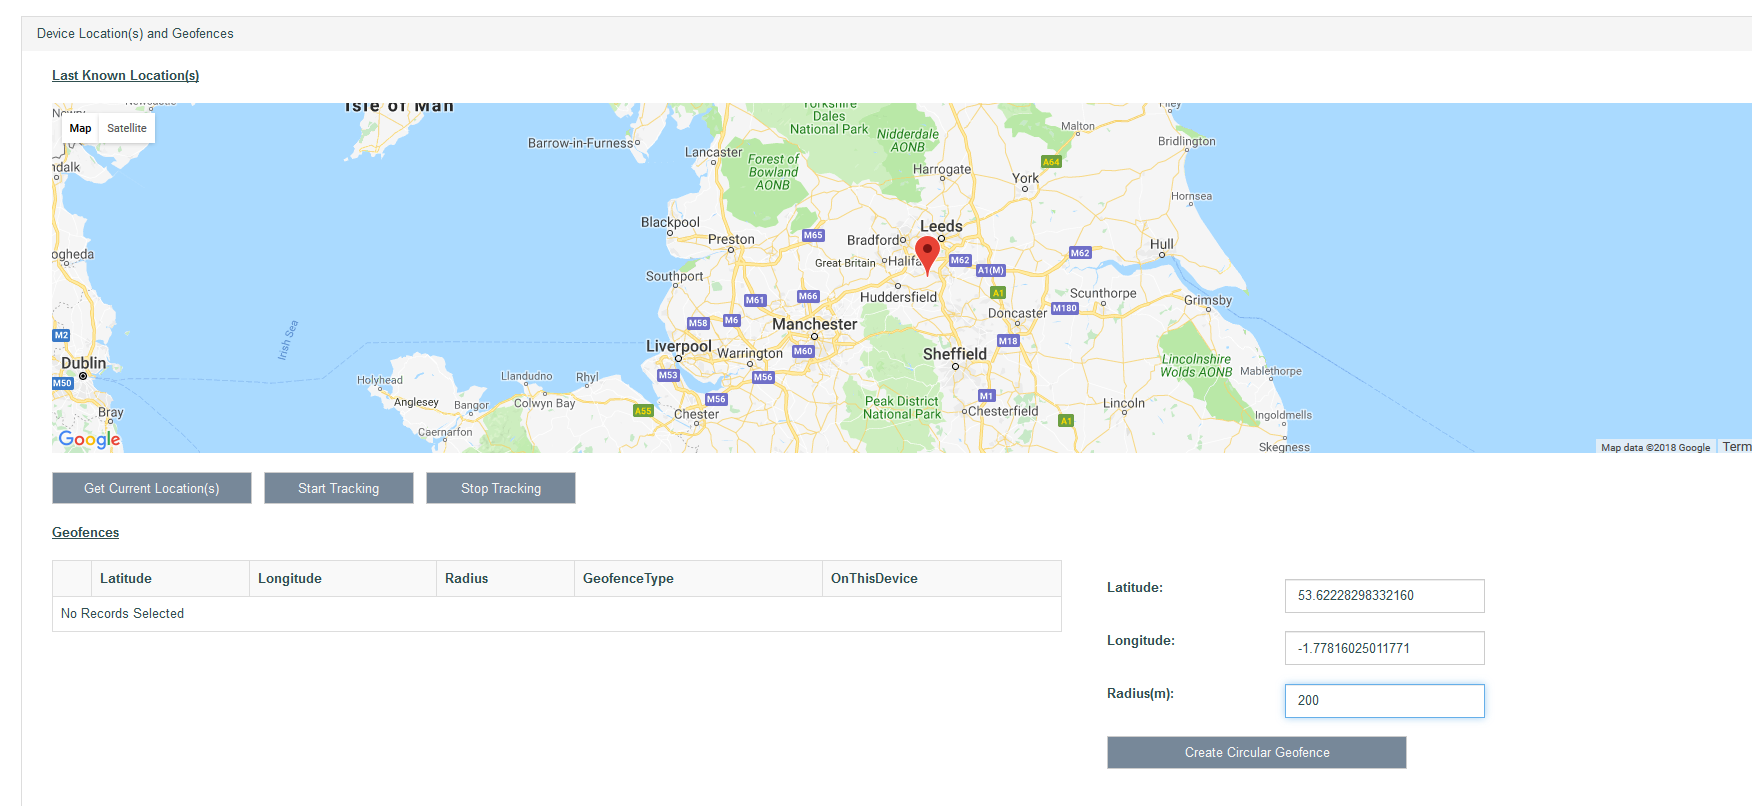
A Geofence is an abstract boundary that marks out an area. For example, the system user could click on the map where their offices are shown. The Latitude and Longitude box are then populated with values. If a value of 200 was entered into the radius box, when the geofence is created, an imaginary circle 200 meters in diameter would surround their offices. As a device crosses the threshold of the geofence and enters the 200 meter circle, the device detects this fact and sends that information to the devreach EMM.
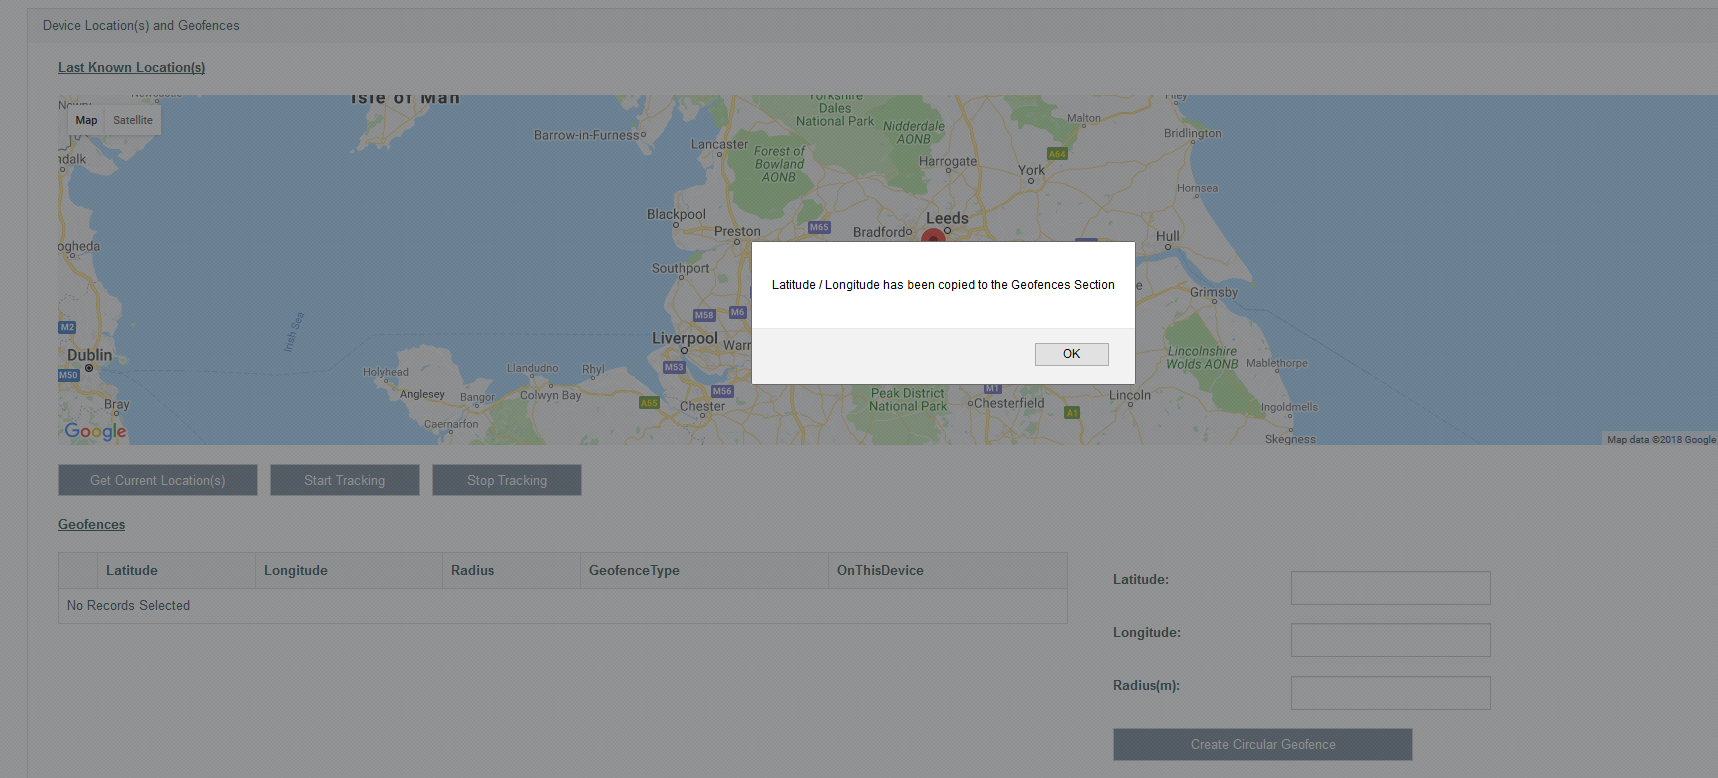
The following screen shows what happens when you click on the map.
Click the OK button to copy the co-ords to the respective boxes and enter a radius (shown below).
Create Circular Geofence
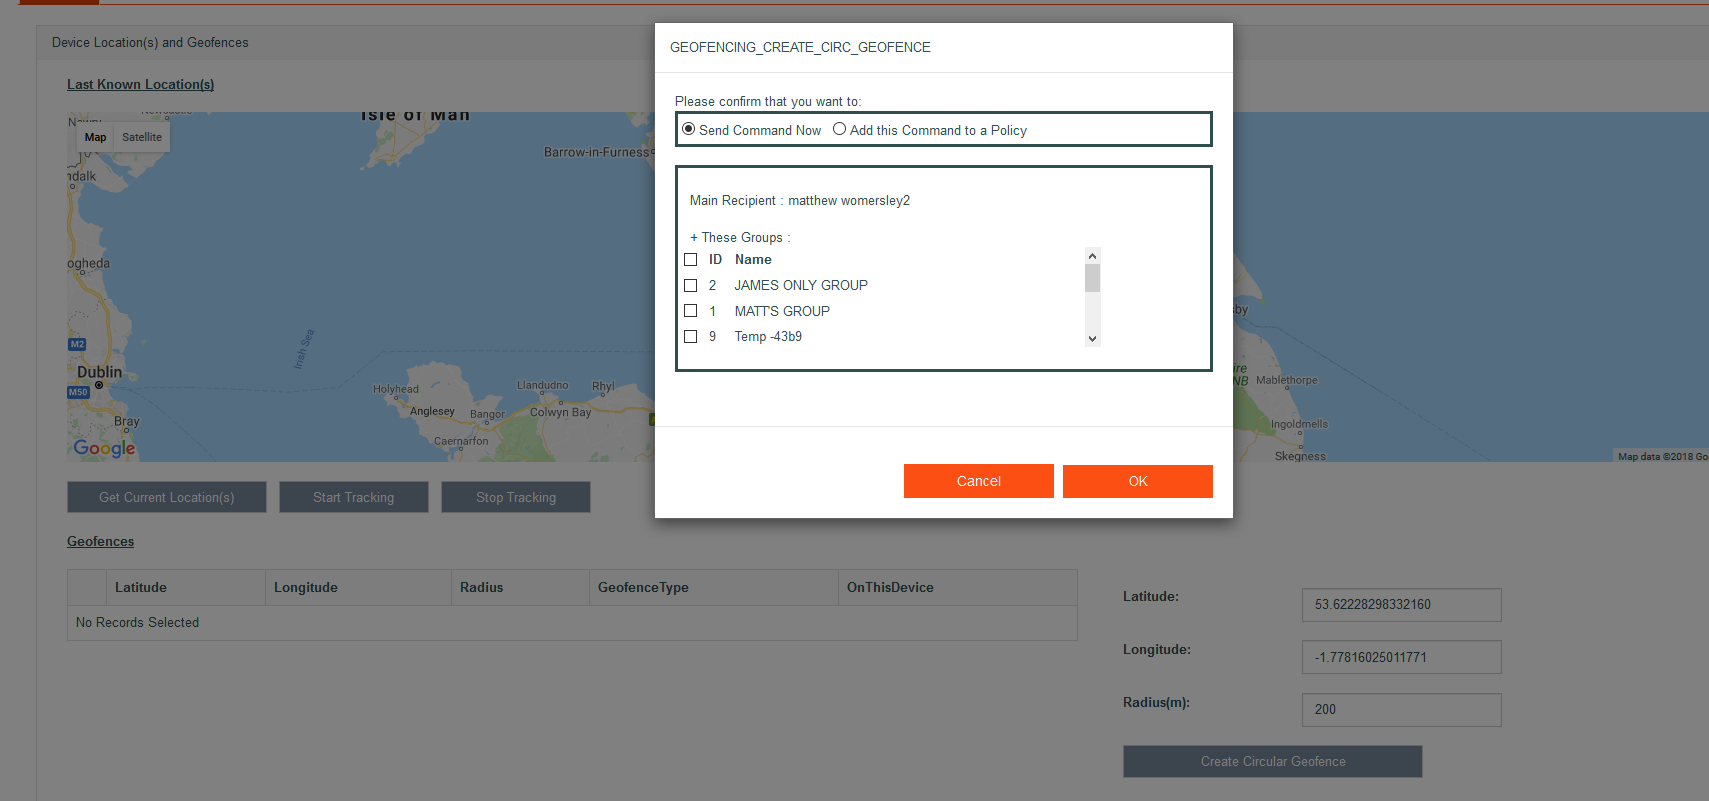
To create the geofence and send the geofence to the device, click the Create Circular Geofence button. This will present the usual popup where you can send the command to the device, add to a Location policy (once one has been created) or send to a group.
The geofence has been created (below). Please wait a few seconds for the device to contact the EMM and for the page to refresh.
Get Geofences
Click Get geofences to retrieve all geofences on a given device. This will populate the geofences table.
Start/Stop Geofencing
Once a geofence has been created, the Start or Stop geofencing commands can be sent to the device. The device will then start to check periodically whether the device's current location is either inside or outside a particular geofence. If a device is within a predetermined geofence, the geofence will appear in the 'Geofences Device Is located Within' table.
Set Min geofencing Check in Meters
This value must be a whole number and specifies how many meters the device can move before a geofence check is initiated. Get Min geofencing Check in Meters button retrieves the value that is currently on the device.
Set Min geofencing Check in Minutes
This value must be a whole number and specifies how many minutes must elapse before a geofence check is initiated. Get Min geofencing Check in Minutes button retrieves the value that is currently on the device.
Destroy Selected Circular Geofence
In order to remove a geofence from the system and the device, select the radio button in the geofences table and click the 'Destroy Selected Circular Geofence' button.
